Angels Landing Hike: Permits, Fear Factor & Trail Tips
DISCLOSURE: This post may contain affiliate links. If you purchase after clicking one of my links, I may earn a small commission at no extra cost to you. As an Amazon Associate, I earn from qualifying purchases. For more information, see my disclaimer.
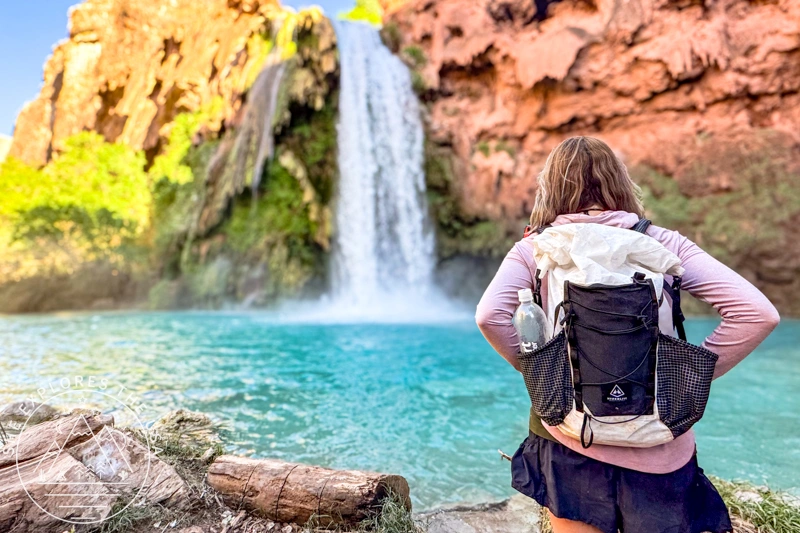
The Angels Landing hike in Zion National Park is a stunning but strenuous adventure, and because of that, it’s also one of the most popular hikes in Zion. To help with crowd control and hiker safety, a permit is required to hike Angels Landing. In this post, I’ll share my firsthand experience on the Angels Landing hike, along with tips for getting a permit and photos to help you prepare for your own hike.
- About the Angels Landing Hike in Zion National Park
- What to Wear + What to Bring to Hike Angels Landing
- Angels Landing Permit 2026
- About the Zion Shuttle
- My Experience Hiking Angels Landing
- So… is Angels Landing Really That Scary?
- Is Angels Landing Worth It?
- Alternatives If You Skip Angels Landing but Still Want Epic Views
- Thinking about doing the Angels Landing hike with a guide?
- Angels Landing Hike FAQ
- Final Thoughts on the Angels Landing Hike in Zion National Park
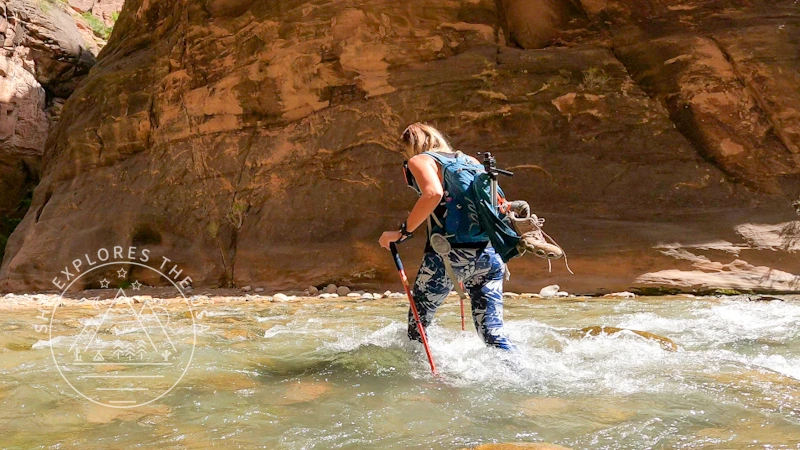
Ultimate Guide To Hiking The Narrows in Zion National Park
If you’re planning to hike The Narrows in Zion National Park, one of the most popular and breathtaking hikes…
About the Angels Landing Hike in Zion National Park
The Angels Landing hike is often called the scariest hike in Zion National Park, and it’s frequently listed among the scariest hikes in the U.S. After hiking it myself, I get why. It’s steep, exposed, and comes with serious drop-offs, but it’s also one of the most iconic hikes in the park. It had been on my bucket list for a long time.
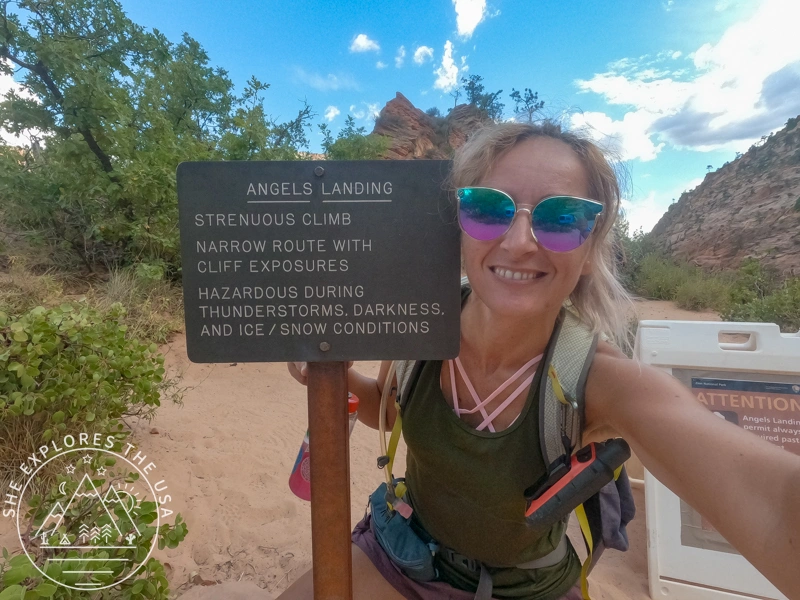
Right at the start of the trail stands a warning sign that pretty much sets the tone for the hike. It says:
“Since 2004, seven people have died falling from the cliffs on this route. The 1.1-mile (1.8-km) round-trip route from Scout Lookout to Angels Landing is a strenuous climb on a narrow ridge over 1,400 feet above the canyon floor. This route is not recommended during high winds, storms, or if snow or ice is present.“
Angels Landing Hike Quick Facts
- Location: Zion National Park
- Shuttle Stop: Stop 6, The Grotto
- Distance: 5.4 miles round trip (Only the final 1.1 miles round trip requires a permit)
- Elevation Gain: ~1,488 feet
- Difficulty: Very strenuous with major exposure
- Why it’s famous: Narrow ridges, chain-assisted sections, and huge drop-offs
Zion National Park Entrance Fee
You’ll need an America the Beautiful Pass to enter Zion National Park. If you plan on visiting two or more national parks in a year, it’s usually the most economical option. I always think of it as a little nudge to explore more public lands while you have it. Once you have the pass, it opens the door to hundreds of national parks, monuments, and recreation areas across the U.S., which makes it well worth it.

Is the Angels Landing Hike Scary the Whole Way?
Honestly, nope. The hike begins relatively gently, with a paved path and a well-maintained trail. Along the way, you’ll tackle Walter’s Wiggles, a series of tight switchbacks that get your heart rate up but are more tiring than scary.
Once you reach Scout Lookout, the trail changes completely. You don’t need a permit to get this far, and plenty of hikers stop here to enjoy the views. The fear factor really kicks in beyond this point, where the trail narrows, and the chain-assisted section begins.
That final stretch, along a narrow ridge with steep drop-offs on both sides, is the only part of the Angels Landing hike that requires a permit, and it’s what gives the hike its infamous reputation.
Would I hike Angels Landing again? Yeah, I would. Partly because it really is that incredible, and partly because I wish I’d taken better photos along the way. Next time, I’m going back with a little more intention (and maybe fewer shaky hands).
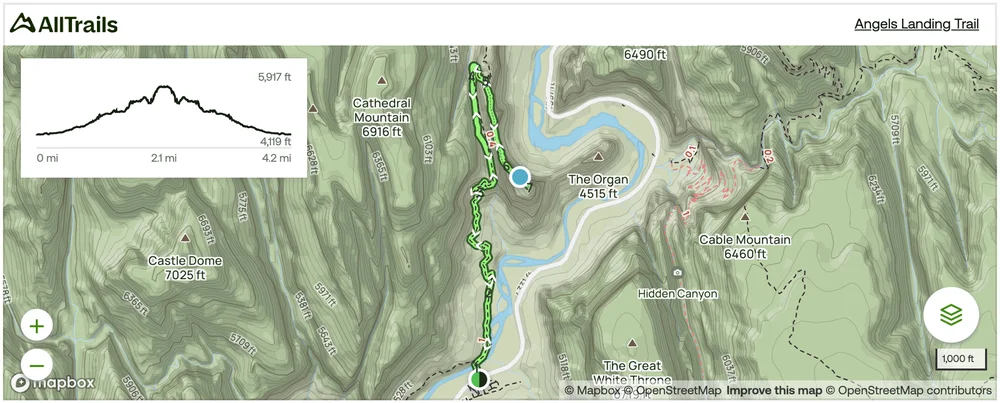
Angels Landing Hike Trail Map
Below is the Angels Landing trail map from AllTrails, which gives a good overview of the full route, elevation gain, and where the chain-assisted section begins.
🥾 Plan Smarter Hikes with AllTrails
AllTrails is my go-to for trip planning, from checking trail reviews to downloading maps, navigating from my phone, and sending routes straight to my Garmin 67i. Offline maps, alerts, and AI route planning make upgrading to Plus & Peak worth it!
Best Time to Hike Angels Landing
Time of day:
Early starts are great if you want cooler temperatures and less pressure from shuttle deadlines later in the day, but they also tend to be the most crowded. I personally recommend an afternoon time slot if you can get one. No matter when you go, it usually ends up working out, as long as you plan your timing and shuttle return carefully.
Best seasons:
Spring and fall are generally the sweet spot for hiking Angels Landing. I hiked it in mid-September, and while rain was in the forecast, it didn’t start until I was on my way back down. If it had rained during the chains section, the hike would have felt much riskier, so keeping an eye on the forecast is important.
Summer considerations:
Summer brings extreme heat to Zion, which can make this hike much more challenging. Start early, carry plenty of water, and be prepared for intense sun exposure.
Winter conditions:
In winter, snow and ice can make Angels Landing dangerous. The exposed sections and chains become especially risky when icy, and this hike is best avoided unless conditions are completely clear and you’re properly equipped.
Angels Landing Safety Tips
- Maintain three points of contact on the chains whenever possible. Move slowly and deliberately, especially in narrow or exposed sections.
- Let faster hikers pass when it’s safe to do so. There’s no rush on this hike, and taking your time helps keep everyone comfortable.
- Turn around if you feel uncomfortable. There’s no shame in stopping at Scout Lookout or anywhere along the trail if the exposure feels overwhelming.
- Pay close attention to the weather. Rain, wind, snow, or ice can make the trail significantly more dangerous, especially on the chain-assisted sections.
Travel Insurance
Before any trip, I always recommend sorting out your travel insurance. World Nomads offers both single-trip and annual worldwide coverage, and you can get a free quote in just a few minutes to see what it would cost for your trip.
👉 Get Your Free QuoteWhat to Wear + What to Bring to Hike Angels Landing
Good, grippy footwear is non-negotiable on this hike. The exposed sections and chains demand solid traction, especially if the rock is damp. I hike in my Altra Lone Peak 9, and they handled every part of this trail confidently. The wide toe box also helps when you’re gripping the rock with your feet on steeper sections.
I didn’t wear gloves on the chains and honestly regretted it. The metal gets cold, and when your hands get sweaty from nerves, your grip suffers. A pair of lightweight grippy gloves makes a real difference on the chains section and adds very little weight to your pack.
I used my Osprey reservoir inside my pack to keep everything light and accessible without stopping to dig through my bag. These days, I’d pair it with my Hyperlite Mountain Gear Elevate 22; it’s now my go-to pack for day hikes like this and would be perfect for Angels Landing.
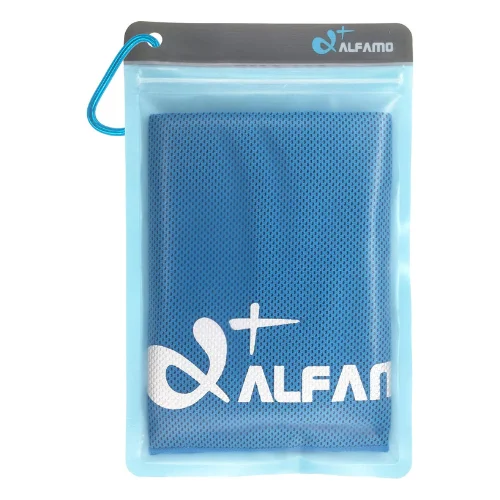
Depending on the season, sunscreen is essential, as there’s very little shade on the upper sections. I also recommend packing electrolytes like LMNT to keep your energy up, especially if you’re hiking in warmer months. A cooling towel is a nice bonus for the descent when the heat really hits.


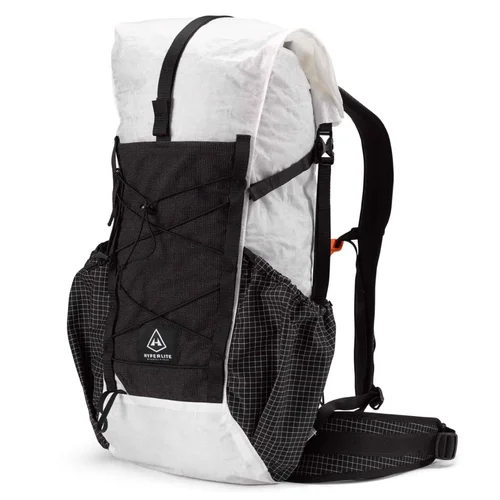


Hyperlite Mountain Gear Elevate 22 Review
The Hyperlite Mountain Gear Elevate 22 review you’ll find here is based on a full year of real use: day…

Altra Lone Peak 9+ Review and LP9+ vs LP9 vs LP9+ GTX
I decided to purchase the Altra Lone Peak 9+ to start the new year with added motivation, and I figured…

How To Clean A Hydration Bladder The Easy Way
Hydration bladders can be an essential part of staying hydrated while adventuring. But even if we only fill these water…
Angels Landing Permit 2026
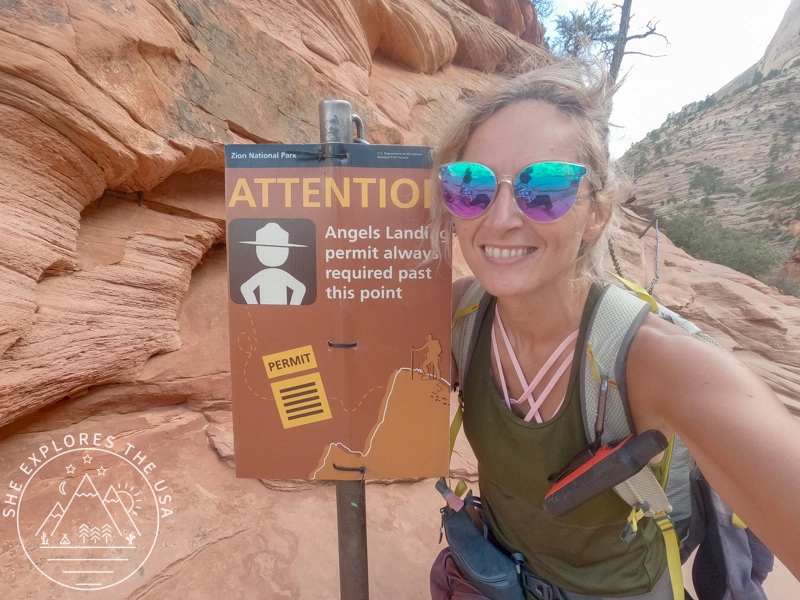
A permit is required year-round to hike the chain-assisted section of the Angels Landing hike, specifically the final 1.1 miles round trip from Scout Lookout to the summit. You do not need a permit to hike up to Scout Lookout, but you’ll be checked before entering the narrow ridge section.
Most people complete the full hike (5.4 miles round-trip) in about four hours, but this time can vary significantly depending on the crowd, conditions, and personal comfort level with exposure. Be sure to build in extra time and don’t rush this hike.
Types of Angels Landing Permits
There are two ways to get an Angels Landing permit, both handled through recreation.gov. (links in tables below)
Seasonal Lottery (Advance Planning)
The seasonal lottery is for hikers who like to plan ahead. You apply in advance and can rank up to seven preferred dates and time windows during your chosen season. Once you know when you’ll be in Zion, you submit your application during the seasonal lottery window for those dates. If selected, you’ll later pay a per-person fee to confirm your permit.
Permit fees:
- $6 non-refundable application fee (covers up to 6 people)
- $3 per person if your permit is awarded (This fee is refundable if you cancel at least two days before your hike)
If you’re not selected, you’ll be notified by email and can still try again through the day-before lottery.
Angels Landing Seasonal Lottery Dates (By Season)
The seasonal lottery for the Angels Landing hike follows a fairly consistent schedule each year. Choose the season you plan to hike, then apply during the corresponding application window.
| Hiking Season (link to lottery page) | Planned Hiking Dates | Lottery Application Window | Permits Awarded |
|---|---|---|---|
| Spring | March 1 – May 31 | January 1 – January 20 | January 25 |
| Summer | June 1 – August 31 | April 1 – April 20 | April 25 |
| Fall | September 1 – November 30 | July 1 – July 20 | July 25 |
| Winter | December 1 – February 28/29 | October 1 – October 20 | October 25 |
Day-Before Lottery (Last-Minute Option)
The day-before lottery is exactly what it sounds like: a chance to snag a permit the day before you want to hike. To apply, you’ll use the same seasonal lottery page (links in the table below). The key difference is timing: instead of applying months in advance, you apply the day before your intended hike, based on the season your hike falls under.
How it works:
- Applications open at 12:01 a.m. MT the day before your hike
- Applications close at 3:00 p.m. MT
- Results are released after 4:00 p.m. MT
For example, if you want to hike on a Tuesday, you’ll need to apply sometime between early Monday morning and 3:00 p.m. Monday (US Mountain Time).
The application fee is the same as the seasonal lottery:
- $6 non-refundable application fee (up to 6 people)
- $3 per person if selected
If you don’t get a permit, you’ll be notified and can try again on another day.
| Hiking Season (link to lottery page) | Planned Hiking Dates |
|---|---|
| Spring | March 1 – May 31 |
| Summer | June 1 – August 31 |
| Fall | September 1 – November 30 |
| Winter | December 1 – February 28/29 |
After You Get Your Permit
Your permit is delivered by email from recreation.gov, and that email is your actual permit. Be sure to either print it or download a copy to your phone ahead of time, cell service is unreliable near the checkpoint, and you don’t want to be scrambling at the last minute. Rangers will check permits at the checkpoint in Scout Lookout before allowing hikers onto the chain section, so make sure it’s easily accessible.
How Did I Get My Permit?
I got my permit through the day-before lottery, and based on my experience, weekday afternoon time slots seem easier to get than mornings.
That said, afternoon permits come with an important catch: you’ll most likely need the Zion shuttle to get back out of the canyon. This means you’re working against the clock to finish your hike before the last shuttle leaves the Grotto stop. If you start late, move slowly, or encounter delays on the trail, things can get stressful fast.
Morning permits are more competitive, but they give you the flexibility of having the entire day to complete the hike without worrying about shuttle deadlines. Whichever option you choose, know your limits and plan your timing realistically.
About the Zion Shuttle
Access to the Angels Landing trailhead depends on whether the Zion shuttle is running. The shuttle operates seasonally and is typically closed during winter, when visitors are allowed to drive their own vehicles on Zion Canyon Scenic Drive, but parking fills up quickly.
When the shuttle is operating (usually spring through fall and during the late-December holiday period), private vehicles are not allowed on Zion Canyon Scenic Drive. The shuttle is free, runs frequently, and is the main way to reach trailheads like Angels Landing, the Narrows, and Emerald Pools.
If you’re hiking late in the day, don’t wait for the last shuttle out of the canyon; if it fills up or you miss it, you could be facing a long walk back to the visitor center. Always double-check the current shuttle status before your visit.
My Experience Hiking Angels Landing
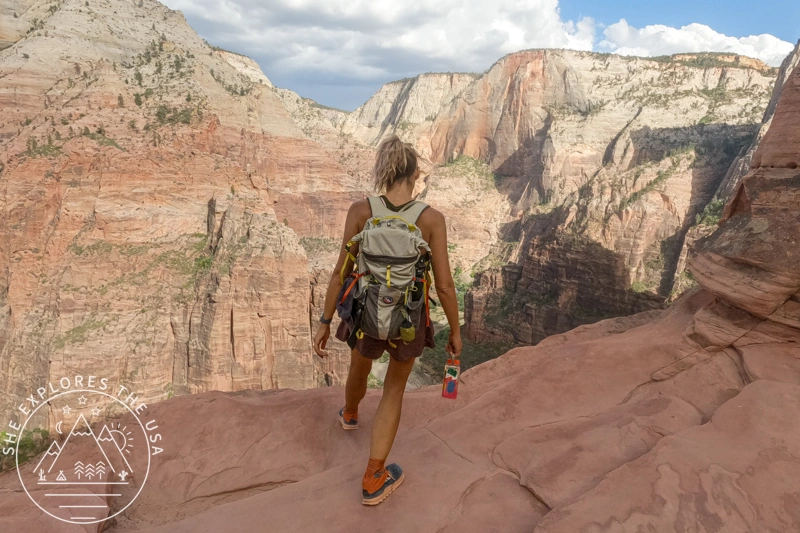
I got my permit for my first day in Zion, but getting there was a mission. I drove from San Diego (about a 7.5-hour drive, plus a time zone change), leaving home around 4.30 a.m. so I could arrive early enough to park, catch the shuttle, do the hike, and still make it back to the Grotto before the last shuttle left. It was a long, very eventful day, but adrenaline kept me going, and I honestly loved every minute of it. I parked near the visitor center and hopped on the shuttle to Stop #6, The Grotto.
💡 In case you’re wondering, there are toilets at Scout Lookout, but they’re pretty smelly and really only useful in an emergency. I wouldn’t plan on relying on them. Using the restrooms at the shuttle stop before starting the hike is a much better idea.
The Start of the Hike
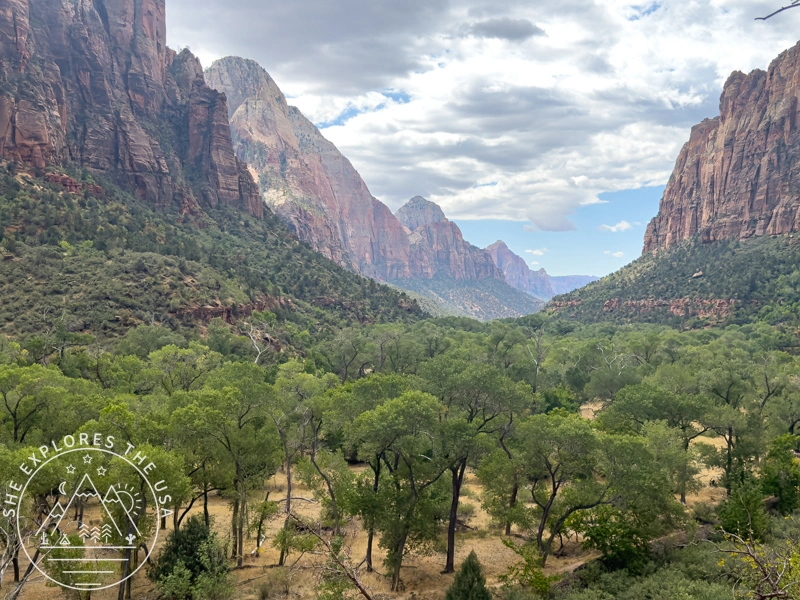
The trail starts across the street from the shuttle stop. It was busy but not overly crowded (weekday, mid-September), and I noticed more people coming down than heading up. Even from the bottom, the views were impressive and gave a great first impression of what was ahead.
The trail is paved all the way to Scout Lookout. It’s uneven in places, but much easier to hike than a dirt trail. There are plenty of spots to stop, wait for friends, or let others pass, and the higher you climb, the better the views get.
Eventually, you reach the bottom of Walter’s Wiggles, the insta-famous switchbacks. They felt easier than I expected, though I was definitely running on adrenaline by that point after such a long day.
Shortly after the switchbacks, you arrive at Scout Lookout, the last viewpoint before the permit checkpoint.


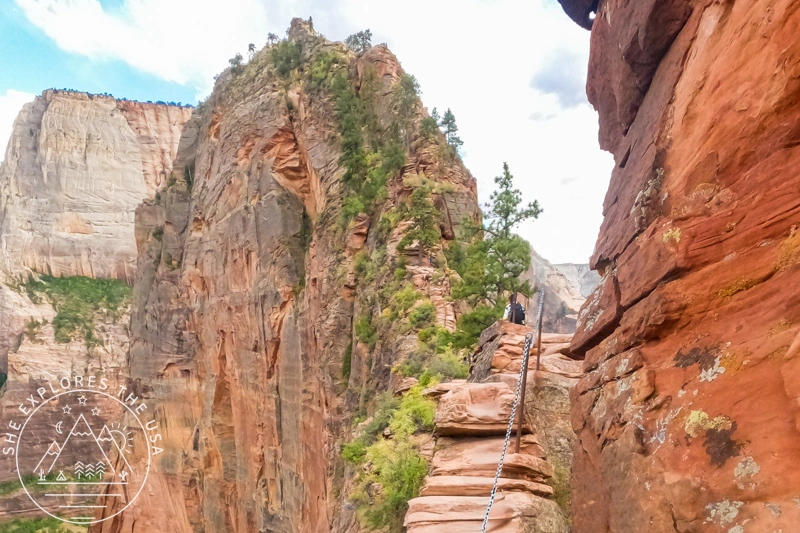
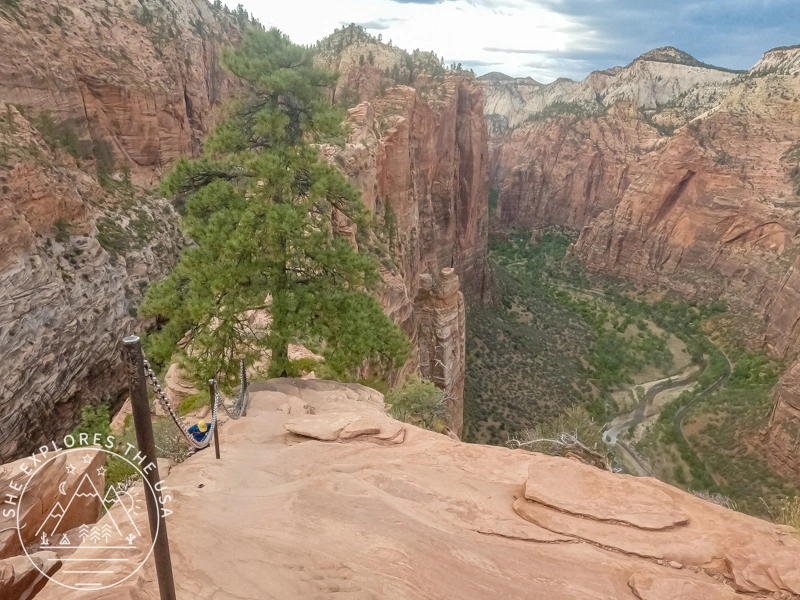
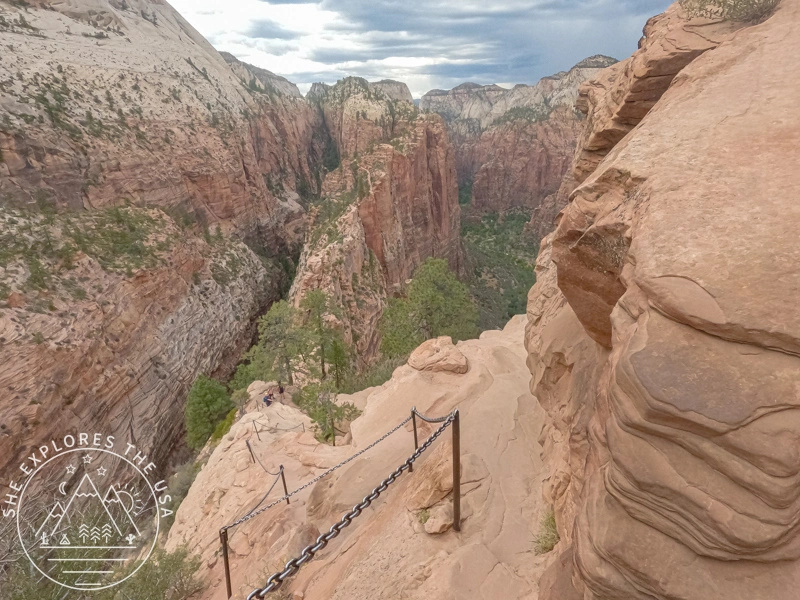
The Chains Section (The Real Test)
Once a ranger checks your permit (if one is present at the time), the chains section begins. This part of the hike is only about half a mile long, but it’s the most intense. The day I went wasn’t overly crowded, though there were hikers moving both up and down, so at times you have to communicate and decide who goes first in certain narrow sections.
Some parts felt more manageable than others, while some were definitely scarier.
Overall, I found that everyone was supportive and respectful of each other’s limits, even though you didn’t necessarily know the people you were hiking near. I met a woman hiking solo who was clearly petrified of heights, yet she pushed through slowly and steadily. I didn’t feel comfortable passing her when the trail narrowed, which slowed us down, but there’s safety in numbers, and I really admired her determination to finish what she started.
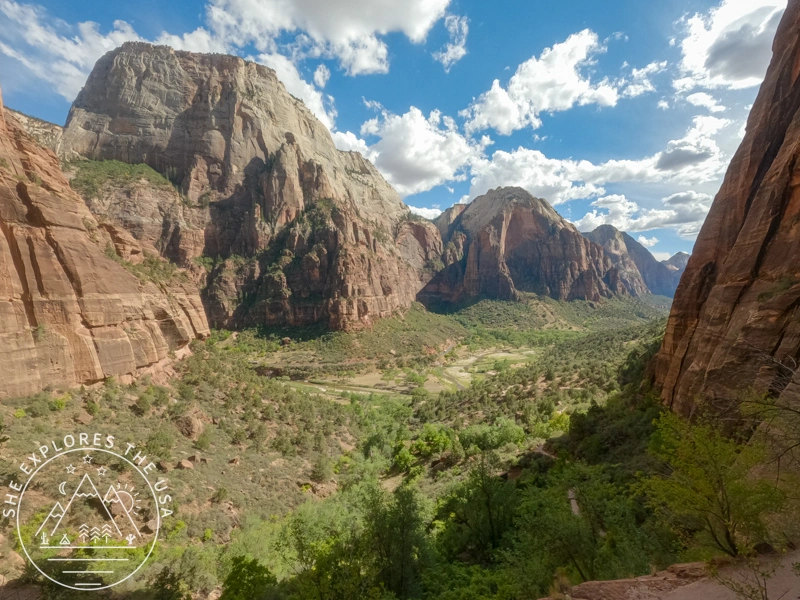
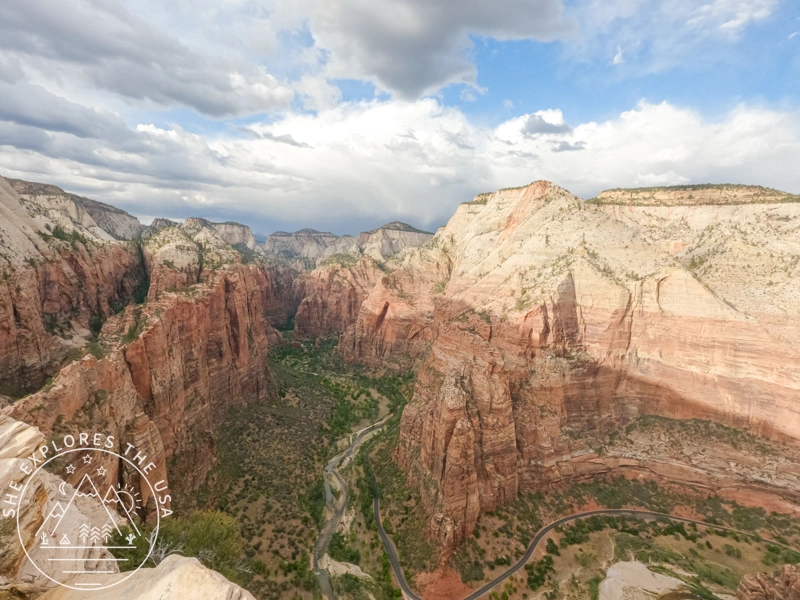
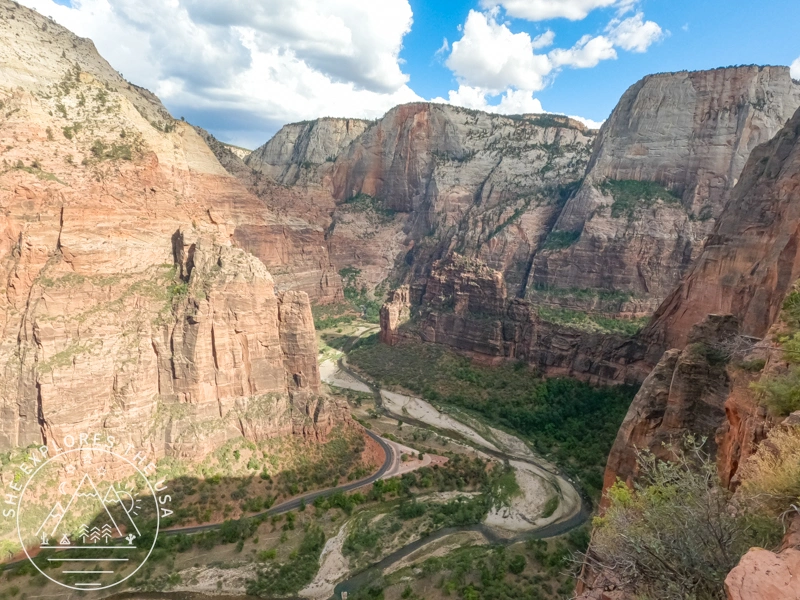
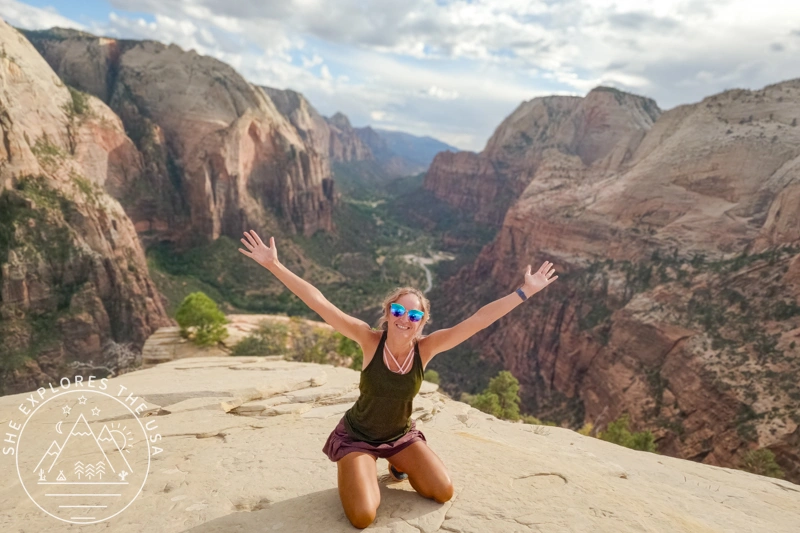
The views along the chains section were incredible, and reaching the summit was the highlight. From the top, you get a bird’s-eye view of the canyon we had just traveled through on the shuttle, absolutely worth it.
After spending some time at the summit, I headed back down to catch the shuttle and made it out with two or three shuttles to spare.
So… is Angels Landing Really That Scary?
The main challenge with the Angels Landing hike is the exposure. After Scout Lookout, the trail becomes narrow, with steep drop-offs, sometimes on both sides. Up to Scout Lookout, there’s really nothing to be afraid of. If you have a fear of heights, you can hike to Scout Lookout first and decide there whether you feel comfortable continuing onto the chain section.
There’s absolutely no shame in turning around at Scout Lookout. If the exposure feels overwhelming, it’s not worth pushing through and risking a panic situation or needing help on the trail.
The chain section itself is relatively short, about 1.1 miles round-trip. I wasn’t completely comfortable, but I also wasn’t petrified. I felt like I had a healthy level of fear that kept me focused and cautious, which helped me move through the chains slowly and conservatively.
The weather is another important factor to consider. Rain, snow, or ice can make the rock slick and significantly increase the risk, especially on the exposed sections.
At the end of the day, whether you think you can do it or you think you can’t, you’re right. I found Angels Landing scary, but I’m still glad I did it, and I would do it again. My best advice is to hike to Scout Lookout first, then decide from there.
Is Angels Landing Worth It?
For me, yes, Angels Landing was absolutely worth it. It was scary at times, mentally challenging, and required staying focused the entire way, but that’s also what made it so memorable. I appreciated being able to hike up to Scout Lookout first and make the decision there, and I’m glad I pushed myself just far enough without going past my comfort level.
I wouldn’t recommend Angels Landing to everyone, especially if heights cause you to panic or freeze rather than stay cautious and controlled. But if you can manage a healthy level of fear, take your time, and respect the conditions, it’s an incredibly rewarding experience. I’d do it again, and next time, I’d just be more intentional about photos and bring gloves for the chains.
Alternatives If You Skip Angels Landing but Still Want Epic Views
If you decide to skip Angels Landing, there are still plenty of hikes in Zion National Park that offer incredible canyon views, without the exposure or permit hassle.
Scout Lookout
This follows the same trail as Angels Landing and takes you all the way to Scout Lookout, which is as far as you can go without a permit any day of the year. The views here are already impressive, and many hikers turn around at this point and feel perfectly satisfied.
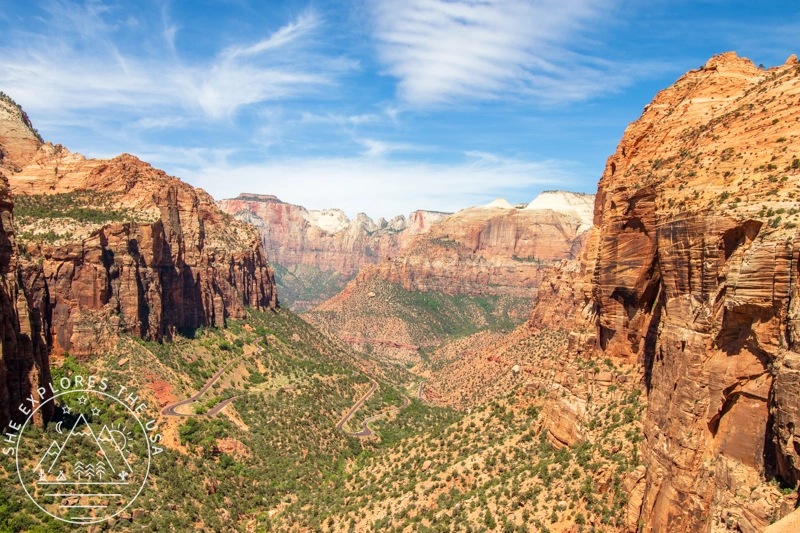
Zion Canyon Overlook Trail
The Zion Canyon Overlook Trail is an easy hike, about 1 mile round trip with roughly 157 feet of elevation gain, and it delivers one of the best views of Zion Canyon for the least amount of effort. I did this hike on my way out of Zion toward Bryce Canyon National Park. The trailhead is located just past the east entrance of the Zion–Mount Carmel Tunnel. The trail winds along the canyon rim through slickrock and pine trees before opening up to a sweeping panoramic view of Zion Canyon below, it genuinely feels like a reward far bigger than the effort required to get there. There are no permits, no shuttles, and no crowds compared to the main canyon trails.
It’s only accessible by private vehicle, with small parking areas on both sides of the road, so you can hike it regardless of which direction you’re driving. For the effort-to-reward ratio, this one is hard to beat.
Observation Point via East Mesa
Observation Point (via East Mesa) is a 7-mile out-and-back hike with approximately 702 feet of elevation gain, offering sweeping views looking down into Zion Canyon. The trailhead is accessed via a dirt road, which can become muddy or impassable depending on conditions, so a 4WD vehicle is recommended. If you can get there, the views at the end are well worth it.
Emerald Pools Trail
The Emerald Pools Trail is a 3-mile hike with approximately 580 feet of elevation gain, offering nice canyon views as you climb. It starts from Zion Lodge, shuttle stop #5. The trail leads to three-tiered pools, Lower, Middle, and Upper Emerald Pool, each offering its own scenery and reward. Lower Emerald Pool is the most accessible and ends at a beautiful waterfall, making it a great turnaround point if you want a shorter outing. The upper pool is quieter and feels more remote despite being the same trail. It’s a more accessible option that still gives you a sense of elevation and perspective, especially if Angels Landing or Observation Point aren’t in the cards.
Watchman Trail
The Watchman Trail is a 3.3-mile round-trip hike with about 646 feet of elevation gain and starts right near the visitor center at Shuttle Stop #1, making it one of the most accessible hikes in Zion.
If you only have a couple of hours in the park or don’t want to deal with permits, crowds, or shuttles deeper into the canyon, this is an easy one to fit into your itinerary. The views are still really nice considering how accessible the trail is, even if they’re not quite as dramatic as the other options listed above.
That said, while it’s probably the least impressive view of the five alternatives mentioned here, it’s still absolutely worth hiking, and a solid choice if time or logistics are limited.

Thinking about doing the Angels Landing hike with a guide?

If Angels Landing feels intimidating to tackle solo, or you don’t have hiking partners, this all-women guided hiking trip by 57hours is a solid alternative that still gets you right there.
The trip includes a guided hike up to Scout’s Lookout, where Angels Landing rises straight ahead. From there, hikers who secured their own Angels Landing permit (I explain how earlier in this post) can continue, while everyone else still gets one of Zion’s most iconic viewpoints.
- Small groups (8–12 women)
- Scout’s Lookout included
- Permits handled independently
- Lodging, meals, transport, and park fees covered
It’s a great fit if confidence, logistics, or going alone is the only thing holding you back, but you still want the real Zion experience.
Angels Landing Hike FAQ
Do you need a permit to hike Angels Landing?
Yes. A permit is required year-round to hike the chain-assisted section from Scout Lookout to the Angels Landing summit. No permit is needed to hike up to Scout Lookout, so you can still hike up there, and you may get lucky and find another hiker who’s got room on their permit for you to tag along with them.
How hard is the Angels Landing hike?
Angels Landing is considered very strenuous due to its elevation gain, narrow trail, and exposure. The physical challenge is manageable for many hikers, but the mental challenge is significant.
Is Angels Landing scary the whole way?
No. The hike is relatively straightforward up to Scout Lookout. The exposed, chain-assisted section after Scout Lookout is where the hike becomes scary for most people.
How long does it take to hike Angels Landing?
Most hikers complete the full 5.4-mile round-trip hike in about four hours, though this can vary depending on crowds, conditions, and comfort level on the chains.
Can you turn around if Angels Landing feels too scary?
Absolutely. Many hikers choose to turn around at Scout Lookout, and there’s no shame in doing so. It’s better to stop early than push past your comfort level.
What’s the best time of year to hike Angels Landing?
Spring and fall generally offer the best conditions. Summer heat and winter ice can make the hike more dangerous, especially on the exposed sections.
Final Thoughts on the Angels Landing Hike in Zion National Park
Angels Landing was a great challenge, and I genuinely recommend anyone who’s considering it to at least give it a shot while visiting Zion National Park. If you make it to the top, the sense of accomplishment afterward is huge, and even if you decide to turn around at Scout Lookout, the experience is still worth it.
This hike isn’t about proving anything. It’s about knowing your limits, paying attention to conditions, and choosing the kind of adventure that feels right for you that day. Take your time, be honest with yourself, and don’t feel pressured to push past your comfort zone.
Whether you hike all the way to the summit or stop short, Angels Landing is one of those hikes that you’ll remember forever, and it’s a reminder that sometimes the biggest reward comes from simply trying. We can do hard things!
Post originally published on January 4, 2026, and last updated on March 26, 2026.