HOVERAir X1 Pro Review for Hiking and Backpacking

DISCLOSURE: This post may contain affiliate links. If you purchase after clicking one of my links, I may earn a small commission at no extra cost to you. As an Amazon Associate, I earn from qualifying purchases. For more information, see my disclaimer.
In this HOVERAir X1 Pro Review, I am sharing my honest experience with my recently purchased HOVERAir X1 Pro flying camera. As a solo traveler and hiker/backpacker, the HOVERAir X1 Pro has been a great addition to my adventure gear. It’s as if I have my own personal photographer and cameraman with me at all times! It also makes me want to take all the trips I’ve ever taken again, to capture them from different angles! So after using it on several trips, here’s my honest review covering what I love and don’t, and how it’s been performing in various conditions.
|
41 Best Gifts for Outdoorsy Women (2026 Guide)
Top picks for hikers, campers & solo adventurers.
|
SEE THE LIST → |
HOVERAir X1 Pro Review
About the HOVERAir X1 Pro (Specs and Key Features)
The HOVERAir X1 Pro is a 4K flying camera designed to keep up with fast-paced sports and outdoor activities, so it’s perfect for solo adventurers who love hiking and backpacking, since it operates completely hands-free without making you stop to set up gear.
Weighing just 192g (6.77 oz) with a compact, foldable frame, it features a 1/2″ image sensor capable of capturing 4K video at 60fps (and up to 120fps slow-motion) with SmoothCapture 2.0 stabilization.
It offers AI-powered tracking at speeds up to 26 mph (42 km/h), up to 16 minutes of flight time, Level 5 wind speed resistance, rear ToF obstacle avoidance, and 32GB of expandable internal storage.
First Impressions
Since I bought the X1 Pro, it’s as if I have my own personal cameraman on the trail, and it’s perfect for solo hikers, solo backpackers, and solo travelers.
So far, I’ve used it for hiking and traveling. Although it’s not waterproof, I’ll still try to take it paddleboarding, as I think it’ll still be able to do what I want to attempt.
This is my first flying camera/drone, so I can’t compare it to others yet, but it’s been very exciting to start taking this out on my trips, and it makes me want to redo every hike and trip I’ve ever done to get new angles of the locations!
It’s super easy to use… You just need to long-press to turn it on, select your flight mode, and short-press it to launch from the palm of your hand within 3 seconds. And it comes right back to you when it’s done flying, to land back in your palm. It’s that simple, and that awesome!
The Challenge the HOVERAir X1 Pro Solved For Me
As a solo hiker, I love my time on the trail, but I don’t always want to stop, set up a tripod, walk ahead for a shot, go back to grab my camera, and then start hiking again. So I often skip filming myself altogether, settle for selfies, or capture clips and photos without me in them.
Now I can have the X1 Pro flying camera follow me, orbit around me, capture a bird’s-eye view, zoom out, and more. It makes my adventures multi-dimensional; I don’t need to walk extra miles anymore, and I can capture clips and shots of myself from perspectives I never could before, and I love that.
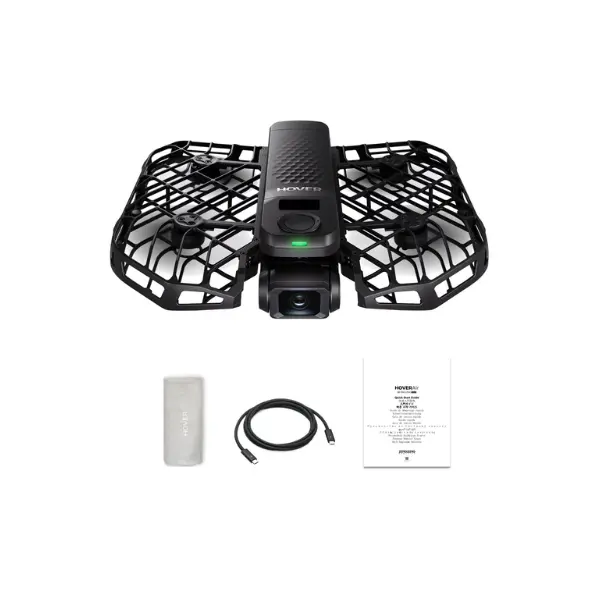
HoverAir X1 Pro Flying Camera
Truly Hands-Free Solo Filming | Ultra-Light & Packable (192g) | Proven Mountain Performance | I recently purchased the HoverAir X1 Pro for my hiking and backpacking trips, and I am genuinely impressed. It folds down…
Unboxing and Getting Started with the HOVERAir X1 Pro
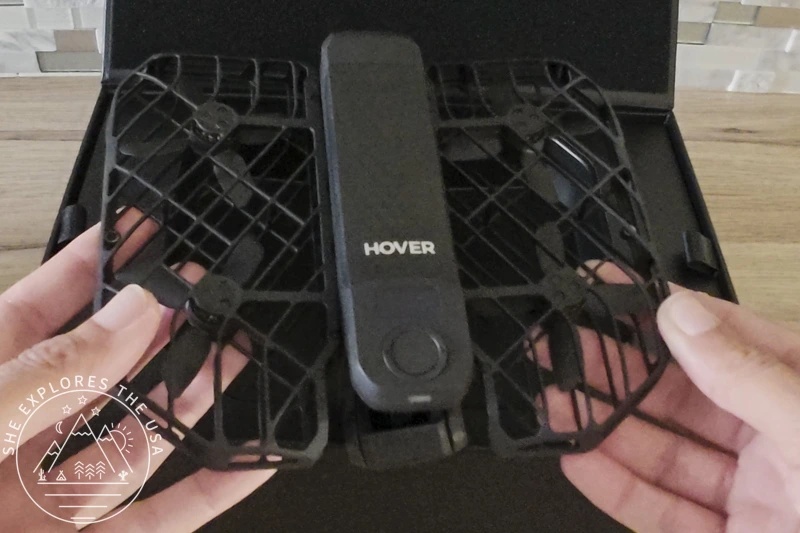
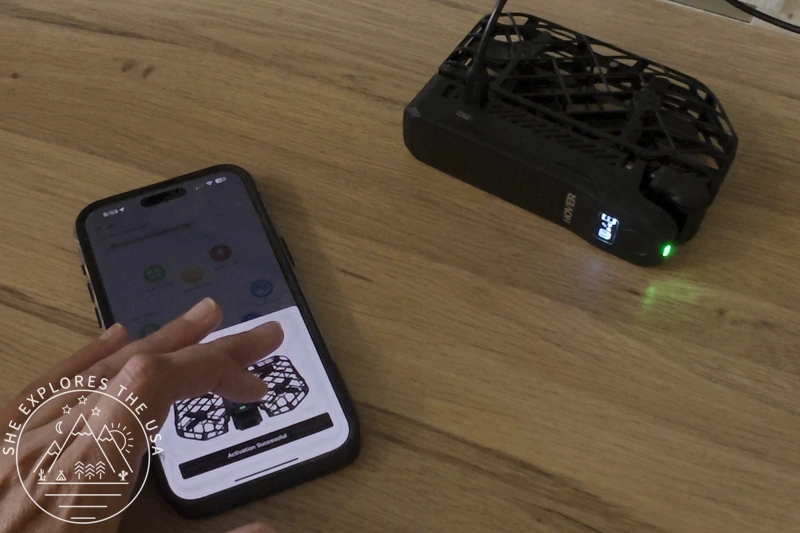
Unboxing the product was obviously very exciting. It was very well packed in a beautiful black box, and it also came with an instructions card to install the app to connect to your phone, setup HOVERCare, if you choose to do so. (I did!).
Charging the battery is the first step when setting up the camera. Mine arrived with 21% battery. The first charge was VERY slow for me (several hours!), I’m not sure if it’s normal or not, but it has never been that slow again since.
HOVERAir X1 Pro Battery Life
Based on my experience and usage, the battery lasts about 15 minutes. A single flight typically consumes 10-15% battery, and I usually fly for 30-90 seconds at a time.
It takes less than an hour to recharge fully, but it’s never started from 0; it’s always still had a few percent left, so far.
I have not attempted to continuously fly it until the battery dies to see how long that might take.
Other Battery Observations
If the battery gets low, and depending on your flight settings, that can mean anywhere from 8% to 25% remaining, the camera will refuse to fly and say out loud, “Low battery.” Definitely be mindful of that if you’re on a time crunch for sunset or sunrise.
On my first sunset hike, I actually missed out on the last flight I’d planned, because the device refused to fly again with 8% battery left when I reached the top of that boulder at the end. If I’d known, I would have topped it off beforehand! Since then, I carry a power bank with me.
High altitude in the mountains also seems to be a culprit for this: when it refused to fly at 8% battery left, I was at 6,000 feet elevation, but when I was up at 10,000 feet, it refused to fly with 25% battery remaining.
I’d recommend buying extra batteries or carrying a power bank to recharge on the go. I actually just received my two extra batteries! They each came with a 21% charge, so I think it’s normal for the batteries to be 20% charged when received now, since that’s been the case for all three of them.
While traveling with one battery, I had to recharge it twice during a full day of adventuring.
Recharging it twice with my 20,000 mAh power bank used about 20% of the power bank’s capacity, so a good portable charger easily gets you through a full day.
All of these constraints are totally manageable. You just need to be aware of them and plan.

Flying in Wet Conditions (Rain, Snow, etc)
The HOVERAir X1 Pro flying camera is neither waterproof nor weatherproof!
I’ve already flown it in snow, though, and the camera obviously did get wet, but it didn’t prevent it from functioning. Obviously, I was only letting it take snow when I wanted to fly; it was otherwise hidden in its pouch and protected. But the pouch also got wet from hiking in the snow for 4 hours.
It was constant snow, but not a crazy snowstorm with no visibility. The heavier it snows, the less visibility, and the more it would affect the drone’s ability to fly safely and use OmniTerrain.
I am not recommending anyone use it in the snow or rain, but if it happens to start snowing or raining a little while you’re using it, unless it’s a huge storm, it will probably be just fine.
OmniTerrain
The HOVERAir X1 Pro has the OmniTerrain feature, which prevents the drone from crashing by adapting to reflective and shifting surfaces. It can work over land and water.
It works by:
- Overriding standard tracking: Normal optical sensors get confused by moving waves or reflections; OmniTerrain uses sensor fusion to maintain a precise, stable hover.
- Detecting elevation shifts: It tracks the water’s surface to prevent the drone from accidentally drifting downward into the water.
- Triggering safety protocols: If it completely loses tracking over a mirror-like surface, it automatically locks into a safe hover or returns to its takeoff point instead of sinking.
Note: The drone itself is not waterproof, and you must maintain a minimum height of 1.5 meters / 5 feet above the water.
Video Quality of the HOVERAir X1 Pro
The video quality is absolutely excellent, both in 4K and even when exported in 1080p. Everyone who has seen my footage has commented on how beautiful it looks.
Here’s a YouTube video featuring raw, unedited 4K footage straight from the HOVERAir X1 Pro flying camera. The only editing I did was trimming the clips so you don’t have to sit through over an hour of footage!
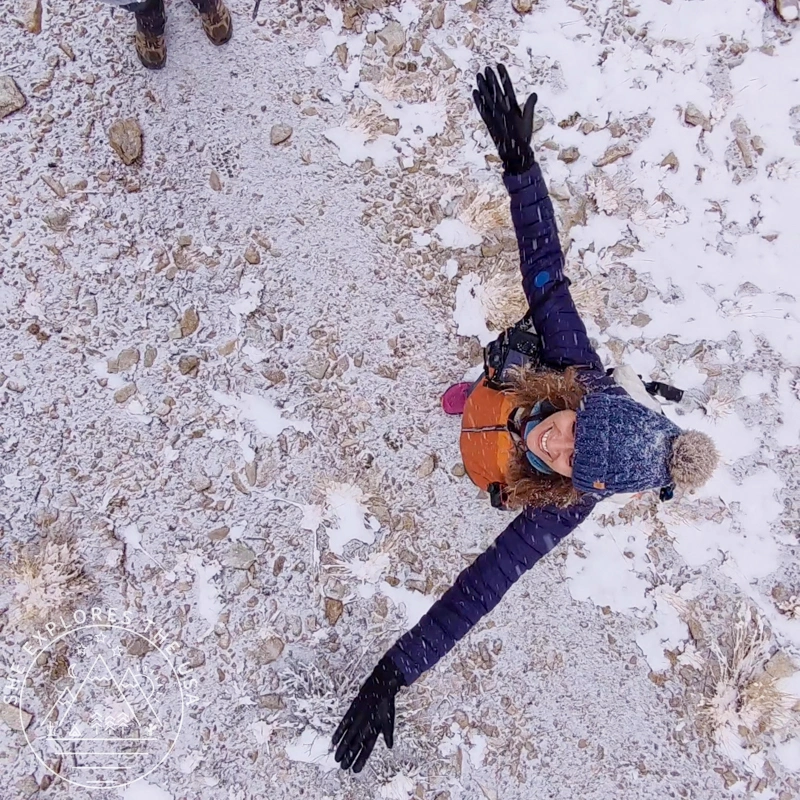
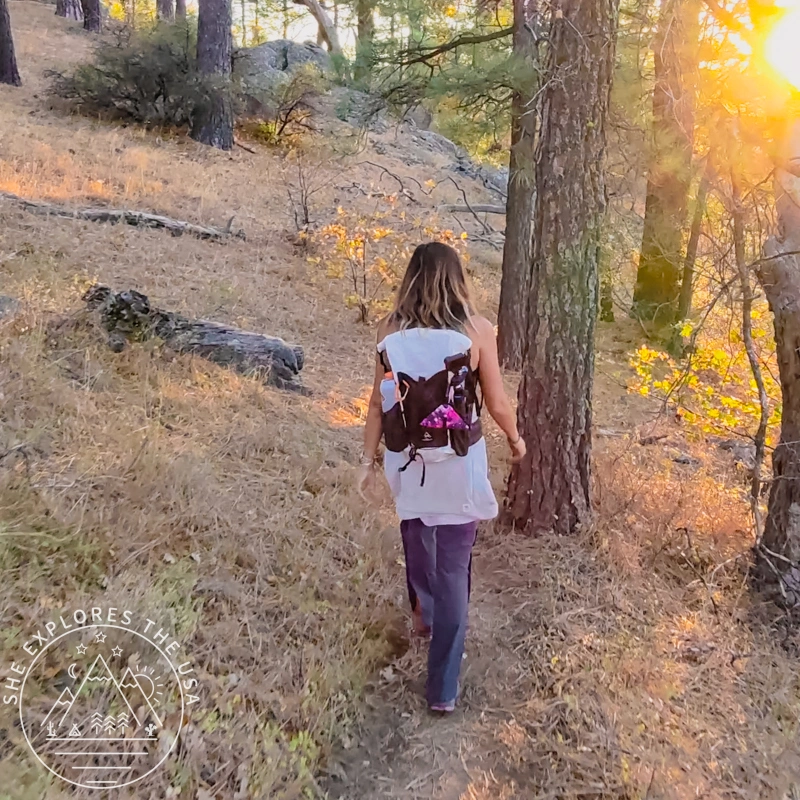
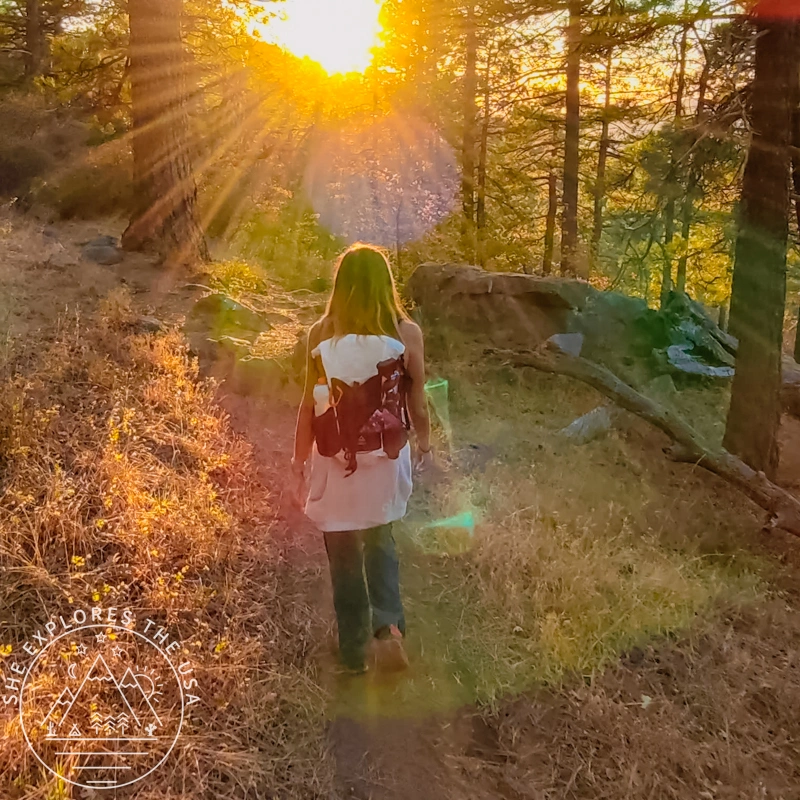
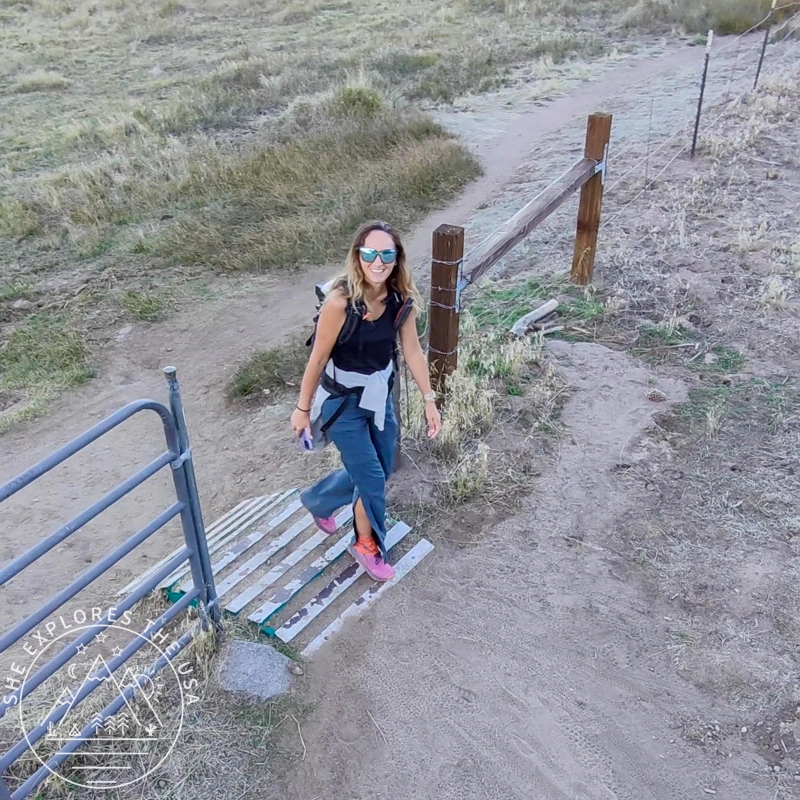
These photos here are simply screenshots of the clips I captured, and they look pretty good!
My Most Used Flight Modes
So far, for solo adventures, I most often use Follow, Orbit, Zoom Out, Bird’s Eye, and Manual Mode. I typically set up the settings through the iPhone app, send them to the camera, and fly! A great feature is that you can choose portrait or landscape recording.
A few notes on Flight Modes:
Follow
Follow is when the camera follows you from a set distance and altitude. I love this mode, and it’s as if I have my own personal cameraman following me on the trail with this mode.
There’s an indoor follow mode as well, which is perfect for real estate filming.
Zoom Out
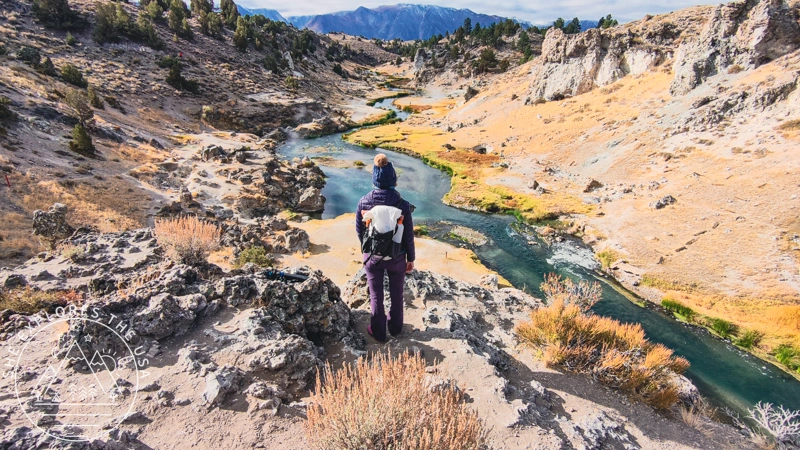
Zoom Out is a great mode to get an overview and photo from a distance inside a scene, like the photo at the top of this blog post. It always comes back to the starting point, but that’s dependent on it reading the terrain correctly. One time it flew by my head instead of stopping in front of me, because I was standing on uneven rock formations.
When I zoomed it out above a still lake at high altitude, the air it pushed out below was causing ripples on the lake water that was otherwise completely still. It was cool to witness.
Bird’s Eye
I do wish the lens was a bit wider sometimes because I’m not always fully happy with how these shots turn out when I’m in a scenic location. I also get dizzy watching the recording of that mode lol.
Manual Mode
I love flying it up above tall trees and doing a 360 turn up there! I use my iPhone app as the controller. And the screen displays both the controls and what I am recording. I can also choose when to start recording, which means I can also forget to press record lol…
Manual mode definitely has a learning curve, though. The left/right controls match the drone’s perspective rather than mine, and I’m really not used to that when I try to fly it back towards me while it also faces me. So it ends up moving the opposite way of what I intend. Practice makes perfect, I’m sure! I like that it has a return-to-home button. Just make sure that you wait a few seconds before flying it when you launch, so that it has time to record where the current home location is. It will say it out loud when it’s done.
HoverAir X1 Pro Flying Camera
Truly Hands-Free Solo Filming | Ultra-Light & Packable (192g) | Proven Mountain Performance | I recently purchased the HoverAir X1 Pro for my hiking and backpacking trips, and I am genuinely impressed. It folds down…
Carrying It on Hikes
A lot of YouTubers claim the device fits in their pockets. Good for them, but I’m a woman, and my pockets aren’t big enough to carry it! The HOVERAir X1 Pro fits in my puffy jacket’s pocket; however, since I typically also carry a backpack, the waist straps prevent me from easily accessing those pockets.
For now, I use the pouch provided and clip it to a carabiner on my shoulder strap, waist, or wherever is most convenient at the time. Usually, I hang it from a carabiner attached to my waist so it’s easier to reach.
However, during a cold, snowy hike, my hands were freezing, and the pouch was getting wet from the snowfall. It was extremely difficult to get the camera in and out of it, so I’m going to buy a slightly larger waterproof container for it instead.
Flying at High Altitude in the Eastern Sierra
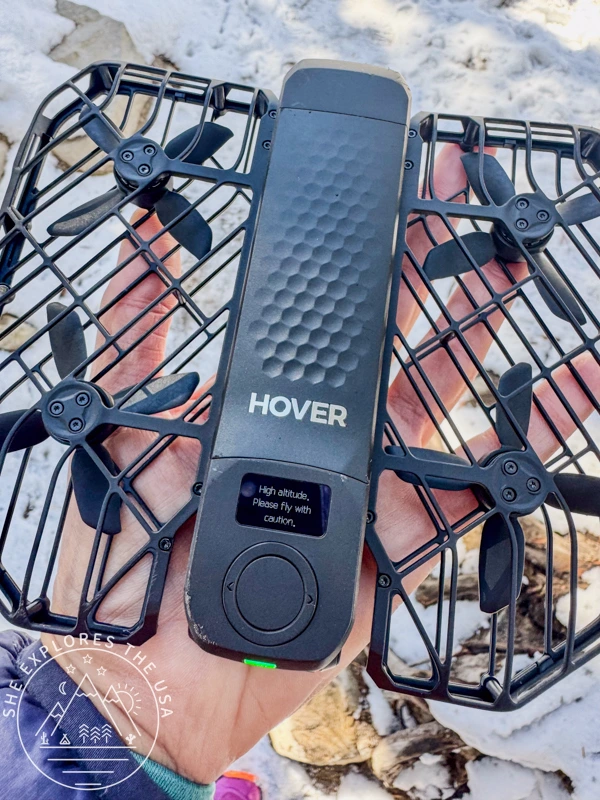
I was hiking at around 10,000 feet on Duck Pass Trail in Mammoth Lakes when the HOVERAir X1 Pro gave me a high altitude warning.
According to the user documentation, flight performance may be affected when flying above 2,500 m (8,202 feet) due to reduced air density. It also states not to fly above 5,500 m (18,044 feet).
I didn’t have any issues, and it did not prevent me from taking any of the flights I had planned. The “low battery” message I got when it was down to 25% may have been a side effect of high elevation, though!
Return to Home (Manual and Preprogrammed Flight Modes)
Whether you trigger manual Return-to-Home or run a pre-programmed mode like Zoom Out, the X1 Pro uses the same core technology to return: bottom-facing cameras that track the visual pattern of the ground beneath it.
I saw the limitations of this system firsthand when I decided to use Zoom Out at Fossil Falls, a striking landscape of smooth, black volcanic rock carved by powerful rivers during the last Ice Age. Standing on a cluster of uneven boulders, the wild shifts in ground height and dark rock textures disoriented the downward sensors during the automated Zoom Out mode. With its visual lock compromised, the drone misjudged its trajectory on the return leg and flew right past me instead of landing smoothly at the launch spot.
Smart Audio Recording (No Propeller Noise)
One clever feature is that the X1 Pro doesn’t record audio on the drone itself. When you fly with the HOVER app open on your phone, it uses your phone’s built-in microphone (or a wireless mic paired to your phone) to capture your voice. The app automatically syncs the audio track to your video while filtering out the high-pitched buzzing of the propellers. It makes narrating on the trail super easy without needing a separate audio recorder or post-production noise removal.
I haven’t intentionally used the audio recording much, but it does work well. It recorded when I was talking to a friend during a bird’s-eye flight, and the sound of the drone itself was not audible at all.
Mid-Air Device Collisions with the HOVERAir X1 Pro
During my first hike with the device, the trail had a tree I had to walk around slightly, and then a side boulder. The HOVERAir X1 Pro was following me and clipped both with its wing. It immediately stopped filming and said out loud, “device collision detected”. The flying camera remained in the air, but it was as if it was shocked by the collision. It was flashing an orange light and only hovering, almost shaking. It’s actually quite funny and cute!
A few hikes later, it flew through branches both in programmed mode and in manual mode when I was flying it, but it didn’t completely stop recording, and it kept moving. So I’m learning what it can and can’t handle.
I crashed it in manual mode once, as it fell to the ground (but perhaps only 20 inches or so). I was flying it back towards me in manual mode, which means right and left are reversed, and I crashed it inside the arch of the boulder! Oops, totally user error and my fault!
I did purchase the HOVERCare protection plan. Obviously, I still wouldn’t take extra risks with it that I wouldn’t take if I didn’t have the protection, but it’s still nice to have that peace of mind.
Comparison of the HOVERAir X1 Series
The full specs are listed in the table below, and I included the other two models in the X1 series to easily compare.
| Feature / Specification | HOVERAir X1 PROMAX | HOVERAir X1 Pro | HOVERAir X1 |
| Starting Price | From $699 | From $499 | From $299 |
| Primary Focus | Ultimate 8K cinematic action | Fast-paced sports & action | Everyday casual vlogging & family |
| Weight | 192 g | 192 g | 125 g |
| Foldable Design | Yes | Yes | Yes |
| Dimensions (Folded) | 4.13 in × 5.87 in × 1.34 in | 4.13 in × 5.87 in × 1.34 in | 5.0 in × 3.39 in × 1.22 in |
| Max Video Resolution | 8K @ 30fps | 4K @ 60fps (4K@120fps slow-mo) | 2.7K @ 30fps |
| Image Sensor | 1/1.3” | 1/2” | 1/2.7” |
| Lens FOV / Equivalent | FOV: 107° (16 mm equiv., f/2.55) | FOV: 104° (17 mm equiv., f/2.8) | FOV: 90° (19 mm equiv., f/2.4) |
| Max Flight Time | 16 minutes | 16 minutes | 11.5 minutes |
| Max Horizontal Speed | 11.7 m/s (26 mph / 42 km/h) | 11.7 m/s (26 mph / 42 km/h) | 7 m/s (15.7 mph / 25.3 km/h) |
| Max Wind Resistance | Level 5: up to 10.7 m/s (24 mph) | Level 5: up to 10.7 m/s (24 mph) | Level 4: up to 7.9 m/s (17.7 mph) |
| Obstacle Avoidance | Rear ToF + Rear Vision Sensor | Rear ToF | No |
| Waterproof Rating | Not waterproof | Not waterproof | Not waterproof |
Why did I Choose the HOVERAir X1 Pro?
I bought the HOVERAir X1 Pro instead of the PROMAX to avoid dealing with huge file sizes and compatibility issues. My main devices are an iPhone 15 Pro Max and a 2019 MacBook Pro, so I didn’t want to struggle with heavy 8K video files. The X1 Pro’s 4K resolution is more than enough for my needs. It delivers great video quality while keeping file transfers fast and editing smooth on my current setup.
HoverAir X1 Pro Flying Camera
Truly Hands-Free Solo Filming | Ultra-Light & Packable (192g) | Proven Mountain Performance | I recently purchased the HoverAir X1 Pro for my hiking and backpacking trips, and I am genuinely impressed. It folds down…
Who Is the HOVERAir X1 Pro For?
The HOVERAir X1 Pro flying camera is perfect for solo hikers, backpackers, and any other adventurers who want dynamic self-shot video without breaking their momentum or setting up tripods. It’s also a great way to get specific trail shots in locations where you wouldn’t feel comfortable getting your camera out.
If you’re a creator needing long-range cinematic drone flights, manual flight controls, or 8K heavy studio setups, then I would recommend the HOVERAir X1 PROMAX for you.
Using the HOVER App
Downloading the HOVER app is one of the first steps to take when you unbox your new flying camera.
The app can connect to the X1 Pro, and you can easily update the flight mode settings in the app and send them to the camera.
Once your flight is completed, you can also view a preview in the album within the app.
And I haven’t had to use it yet, but it’s also possible to locate the HoverAir X1 Pro from the app, in case you crash and lose it. This feature is likely more handy for fast-moving sports users. For me, with hiking, I’m not sure how I would lose track of it at this time. But never know!
The app also has a bunch of tutorials that are pretty useful to get started. And there’s also a community with a monthly challenge where you can submit your creations.
Flight Restrictions
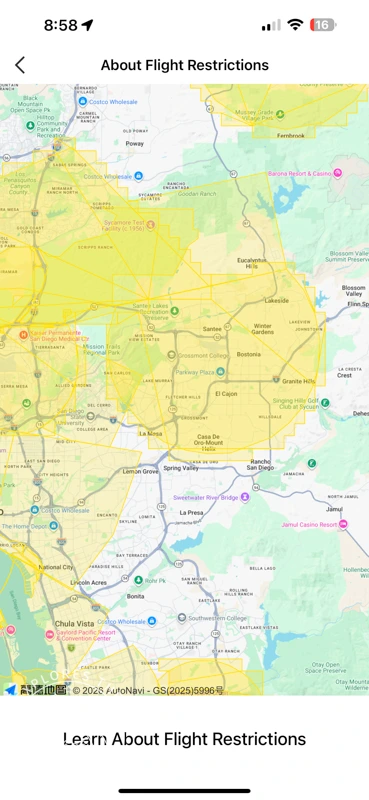
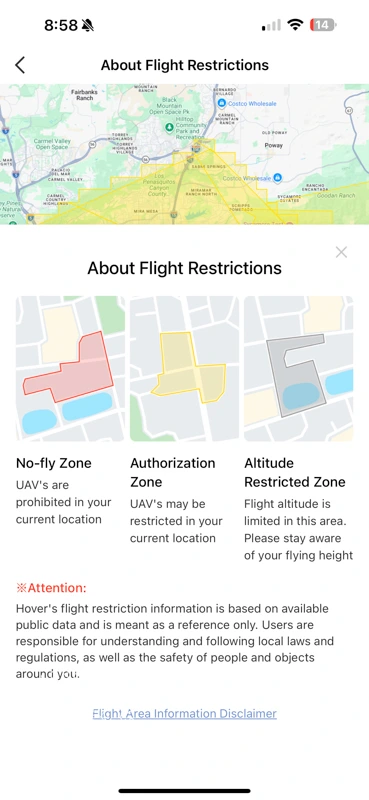
The app also has an important section under “Me” to check restricted flight areas.
Always check that you are allowed to fly where you intend to use it. However, don’t rely on the app alone; it might show places like Joshua Tree as clear, even though launching in National Parks is strictly banned, and State Parks have their own rules.
HOVERAir X1 Pro Pros & Cons
I absolutely LOVE this HOVERAir X1 Pro flying camera. It’s literally a dream come true to finally have one, and it feels like an answer to my prayers! The benefits far outweigh the cons, and I recommend it to anyone tempted to get one!
Pros
- Perfect for solo adventurers: Acts as your own automatic cameraman.
- Versatile flight options: Features easy pre-programmed modes alongside full manual control.
- Compact & lightweight: Weighs just 192g (6.77 oz), making it ultra-portable for trail use.
- Great video quality: Delivers clean footage in both 4K and 1080p.
- Convenient field charging: Easy to top off on the go using a portable power bank.
- Enclosed propeller cage: Protects the blades so minor mid-air bumps don’t cause a total crash.
Cons
- Short battery life: Requires carrying extra batteries or a power bank for long days.
- High elevation lockout: Battery safety limits restrict flight at high altitudes.
- Visual sensor disorientation: Shifting elevation or uneven terrain can confuse downward cameras, causing trajectory drift on return.
HoverAir X1 Pro Flying Camera
Truly Hands-Free Solo Filming | Ultra-Light & Packable (192g) | Proven Mountain Performance | I recently purchased the HoverAir X1 Pro for my hiking and backpacking trips, and I am genuinely impressed. It folds down…
Frequently Asked Questions about the HOVERAir X1 Pro
Do I need a controller or phone to fly the HOVERAir X1 Pro?
No. The HOVERAir X1 Pro launches from your palm in under 3 seconds and flies pre-programmed modes on its own. The app is optional, for manual control and downloading footage. My phone becomes the controller, via the app, when I use manual mode.
How long does the HOVERAir X1 Pro battery last?
The battery on the HOVERAir X1 Pro lasts about 16 minutes (1920 mAh). A 65W charger or hub charges one battery in 45 minutes, two in 60. You can also charge it with your regular power bank.
Is HOVERAir X1 Pro waterproof?
No. The HOVERAir X1 Pro is not waterproof, nor weatherproof. But with OmniTerrain on, it’s designed to fly over water surfaces. I also flew my HOVERAir X1 Pro when it was snowing; it still survived even though it got wet!
Do I need FAA registration to fly the HOVERAir X1 Pro?
No, the HOVERAir X1 Pro does not require an FAA registration because it is well under 250g (about 192g). However, you still need to be aware of where you can and cannot fly it and respect local regulations!
What’s the video quality with HOVERAir X1 Pro?
The video quality is really excellent on HOVERAir X1 Pro! 4K at 60fps, 1080p at 120fps slow motion, 2.7K/60 vertical for social, 12MP photos. Two-axis gimbal plus electronic stabilization. Everybody comments how good the footage looks!
How much storage does the HOVERAir X1 Pro have?
The HOVERAir X1 Pro has 32GB built-in, plus a microSD slot that takes up to 1TB.
How fast can HOVERAir X1 Pro follow me?
The HOVERAir X1 Pro can follow me at speeds up to 42 km/h (26 mph), 60 km/h top burst.
Does HOVERAir X1 Pro avoid obstacles?
The HOVERAir X1 Pro only has rear collision detection (a rear ToF sensor), not full omnidirectional sensing. The HOVERAir X1 PROMAX comes with Rear ToF and a rear vision sensor.
Can HOVERAir X1 Pro fly indoors?
Yes, there is an indoor follow mode in the HOVERAir X1 Pro, so it’s perfect for real estate video filming, and the caged propellers make it safe around people, too.
Does HOVERAir X1 Pro have GPS?
The HOVERAir X1 Pro does not have built-in GPS. It has tracking with visual AI, but it is not GPS-based. It also has a return-to-home function in manual mode, which needs ground texture to lock onto, so over open water it’s less reliable.
What’s the difference between X1 Pro and X1 ProMax?
HOVERAir X1 PROMAX adds 8K/30 video, a larger 1/1.3-inch sensor, 64GB storage, and a brighter f/2.55 lens. Starts at $699 vs. $499.
Final Thoughts on the HOVERAir X1 Pro Review
Overall, I am super happy with my HOVERAir X1 Pro flying camera! It’s as if I have my own personal cameraman with me at all times. Both the pre-programmed and manual modes are easy to use and very versatile.
The HOVERAir X1 Pro flying camera is a great device for solo adventurers who love hiking and backpacking. I’ll keep updating as I learn more from my experience with this device, and I’ll definitely also update when I’ve tried to fly it on a windy peak soon!
HoverAir X1 Pro Flying Camera
Truly Hands-Free Solo Filming | Ultra-Light & Packable (192g) | Proven Mountain Performance | I recently purchased the HoverAir X1 Pro for my hiking and backpacking trips, and I am genuinely impressed. It folds down…